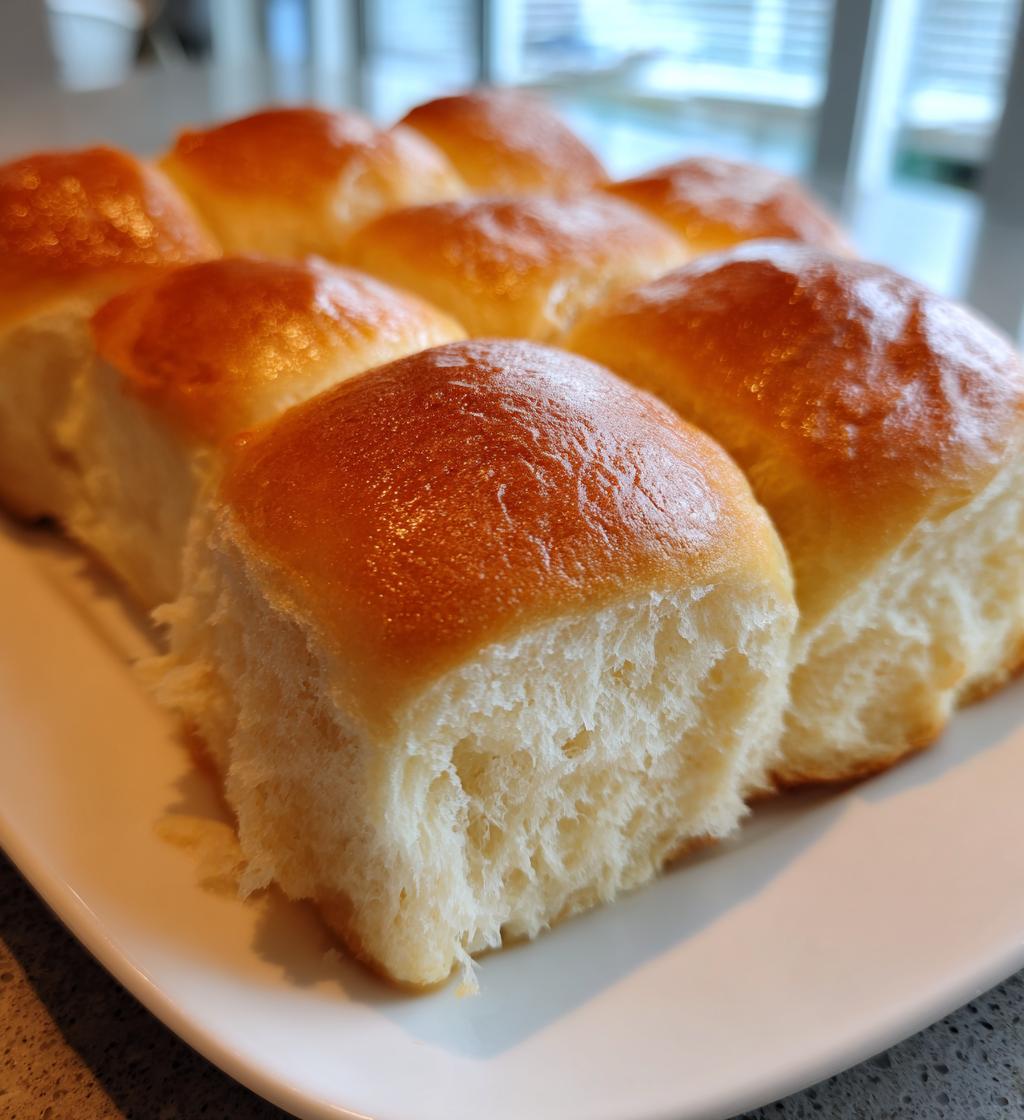
There’s something truly special about the smell of freshly baked bread wafting through your kitchen, isn’t there? Well, let me tell you, my secret to the *best* quick hamburger buns will change your summer barbecues and weeknight dinners forever! This recipe is not only lightning-fast but also incredibly satisfying—it brings that delightful homemade touch without the fuss. Trust me, once you try these buns, you’ll never want to reach for store-bought again.
Picture this: it’s a warm evening, and you’ve got friends over for a backyard BBQ. You pull these golden-brown buns out of the oven, and everyone can’t help but rave about how perfect they are for juicy burgers or even veggie patties! Honestly, nothing beats the feeling of serving up homemade buns, knowing they’re made with love and simple ingredients. Plus, they’re so quick to whip up; you’ll wonder why you didn’t start making them sooner!
Ingredients for Quick Hamburger Buns
Here’s what you’ll need to make these delightful quick hamburger buns. Trust me, these ingredients are super simple and you probably have most of them in your pantry right now!
- 2 cups all-purpose flour
- 1 cup warm water (make sure it’s not too hot or too cold—think baby bottle warm!)
- 2 tablespoons sugar (this adds just the right touch of sweetness)
- 1 tablespoon active dry yeast (always check the date to make sure it’s fresh!)
- 1 teaspoon salt (don’t skip this; it really enhances the flavor)
- 2 tablespoons vegetable oil (for that lovely, soft texture)
Gather these ingredients, and let’s get ready to bake some buns that will make your burgers shine!
How to Prepare Quick Hamburger Buns
Now, let’s dive into the fun part—making these quick hamburger buns! I promise, the steps are straightforward, and soon you’ll find yourself a bun-making pro. Follow along closely, and don’t worry, I’m here to guide you through each stage.
Step-by-Step Instructions
- Activate the yeast: In a medium bowl, mix your warm water and sugar together. Sprinkle the active dry yeast on top, and let it sit for about 5 minutes. You should see it start to froth and bubble—a good sign that your yeast is alive and kicking!
- Combine the ingredients: Once your yeast mixture is bubbly, add in the flour, salt, and vegetable oil. Mix everything together until the dough starts to come together. It might look a bit messy, but that’s okay; we’re going to knead it!
- Knead the dough: Transfer your dough onto a lightly floured surface and knead it for about 5 minutes. You want it to be smooth and elastic. If the dough is too sticky, sprinkle a bit more flour. Just remember, don’t go overboard—too much flour can make your buns tough!
- Let it rise: Place your kneaded dough in a greased bowl and cover it with a clean kitchen towel. Now, here’s where the magic happens: let it rise in a warm spot for about 1 hour, or until it doubles in size. This step is crucial for that fluffy texture!
- Preheat the oven: While your dough is rising, go ahead and preheat your oven to 375°F (190°C). This way, it’ll be nice and hot when it’s time to bake.
- Shape the buns: Once your dough has risen, punch it down gently to release the air. Divide the dough into 6 equal pieces and shape each piece into a round bun. Don’t stress about making them perfect; a little rustic charm is always welcome!
- Second rise: Place your shaped buns on a baking sheet lined with parchment paper. Cover them again with a towel and let them rise for another 30 minutes. This step will help them puff up nicely in the oven.
- Bake those beauties: After the second rise, pop the buns into your preheated oven and bake for 15-20 minutes until they’re golden brown. The aroma will be irresistible, and you’ll know they’re ready when they sound hollow when tapped lightly on the bottom.
And just like that, you’ve made your very own quick hamburger buns! Let them cool for a few minutes before slicing, and get ready to enjoy them with your favorite burger fillings. You’re going to love it!
Nutritional Information Disclaimer
Before you dive into these delicious quick hamburger buns, I want to remind you that the nutritional information can vary based on the specific ingredients and brands you use. While I’ve provided some general figures, it’s always best to calculate the exact nutrition based on the products you choose. So, don’t sweat the details too much—focus on enjoying the process and the tasty results!
Why You’ll Love This Recipe
- Quick Preparation Time: You can whip up these buns in just 1.5 hours! Perfect for those last-minute gatherings or a quick weeknight dinner.
- Simple Ingredients: No fancy stuff here! Just basic pantry staples that you probably already have on hand.
- Delicious Results: These buns are soft, fluffy, and have that delightful homemade taste that elevates any burger!
- Customizable: You can easily tweak the recipe to suit your taste—add herbs, spices, or even a sprinkle of sesame seeds on top!
- Perfect for Any Occasion: Whether it’s a summer barbecue, a picnic, or a cozy family dinner, these buns fit right in.
- Freezer Friendly: Make a big batch and freeze them for later—just reheat and enjoy fresh buns anytime!
Tips for Success
Now that you’re ready to tackle these quick hamburger buns, let me share some pro tips to ensure you achieve the best results every time. Baking can be a bit fussy, but with these handy hints, you’ll be a bun master in no time!
Kneading to Perfection
When it comes to kneading, think of it as a workout for your dough! You want to knead it until it’s smooth and elastic—about 5 minutes should do the trick. If you find the dough is sticking to your hands or the counter, sprinkle a little extra flour, but don’t go overboard. A sticky dough is a sign of a happy bun, but too much flour can lead to tough results!
Timing is Everything
For the best rise, give your dough the time it needs. Don’t rush the first rise; let it double in size! If your kitchen is on the cooler side, consider placing the dough in a warm spot, like near the oven as it preheats. This little trick can make a world of difference in how fluffy your buns turn out!
Baking Techniques
When it comes time to bake, make sure your oven is fully preheated to 375°F (190°C). This ensures that the buns rise properly and develop that lovely golden color. If you want an extra touch of shine, brush the tops with a bit of melted butter or an egg wash before baking. It’s a simple step that takes your buns from good to showstopper!
Lastly, let those buns cool on a wire rack after baking. This prevents them from getting soggy on the bottom and keeps that delightful texture intact. Trust me, these small details make all the difference and will have everyone asking for your secret!
Variations on Quick Hamburger Buns
Feeling adventurous? There are so many fun ways to mix things up with these quick hamburger buns! I love experimenting with different flavors and textures, and I can’t wait to share some ideas that’ll inspire your own bun creations. Trust me, once you start playing with variations, you’ll find it hard to go back to plain buns!
Add Fresh Herbs
One of my favorite tweaks is to incorporate fresh herbs into the dough. Imagine biting into a bun infused with the vibrant flavors of rosemary, thyme, or even basil! Just chop up about 2 tablespoons of your chosen herbs and mix them into the flour before combining with the wet ingredients. It adds a lovely aromatic touch that pairs beautifully with any burger!
Whole Wheat Flour Alternative
If you’re looking for a healthier option, you can swap out some or all of the all-purpose flour for whole wheat flour. I usually start with half and see how it goes. Whole wheat flour gives a nutty flavor and a denser texture, which can be really satisfying. Just remember to keep an eye on the hydration; you might need to adjust the amount of warm water slightly since whole wheat absorbs more moisture.
Making Slider-Sized Buns
Planning a party or just want to try something cute? Make slider-sized buns by dividing the dough into smaller pieces—think golf ball size! The baking time will be shorter, around 10-12 minutes, so keep an eye on them. These mini buns are perfect for appetizers or serving with an array of toppings, letting everyone create their own bite-sized burger heaven!
Cheesy Buns
For cheese lovers, why not fold some shredded cheese into the dough? Cheddar, mozzarella, or even pepper jack can add a delightful twist! Just be sure to use a little less flour if you add a lot of cheese to keep the dough from becoming too dense. You’ll end up with buns that ooze deliciousness with every bite!
Sweet Buns for Breakfast
Feeling like a sweet treat? You can easily transform these buns into a delightful breakfast option! Add a couple of tablespoons of honey or maple syrup into the mix and sprinkle in some cinnamon. You could even fold in chocolate chips or dried fruit for a little extra sweetness. Serve them warm with butter, and trust me, you’ll have a breakfast hit!
These variations not only keep things exciting but also make your quick hamburger buns versatile for any occasion. So go ahead, get creative, and have fun in the kitchen! You really can’t go wrong with a little experimentation.
Storage & Reheating Instructions
Now that you’ve made a batch of delicious quick hamburger buns, let’s talk about how to store them and keep them fresh for later! Trust me, you’ll want to savor these buns for as long as possible.
To store your leftover buns, simply place them in an airtight container or a resealable plastic bag. This helps prevent them from drying out and keeps them soft and fluffy. If you’re planning to keep them for more than a couple of days, consider placing a slice of bread in the container—this little trick keeps everything nice and moist!
If you’ve baked a big batch and want to save some for later, these buns freeze beautifully! Just make sure they’re completely cool before wrapping them tightly in plastic wrap and then placing them in a freezer-safe bag. They can be stored in the freezer for up to three months. When you’re ready to enjoy them, just pull out the number you need and let them thaw at room temperature.
Now, for reheating, there are a couple of easy methods. If you’re in a hurry, you can pop them in the microwave for about 10-15 seconds, just to warm them up. But if you want that freshly baked texture, I recommend using the oven. Preheat your oven to 350°F (175°C), place the buns on a baking sheet, and warm them for about 5-7 minutes. You’ll love how they regain that soft, fluffy goodness!
So go ahead, store those buns with confidence, and enjoy them at your convenience. Whether it’s a quick lunch or a weekend BBQ, you’ll always have the perfect homemade touch ready to go!
Serving Suggestions
Now that you’ve got your quick hamburger buns ready to go, let’s talk about what to serve with them! The beauty of these buns is their versatility—they can complement so many delicious dishes. Here are some of my favorite ideas that will make your meal extra special!
Classic Burgers
You can’t go wrong with the classic! Grill up some juicy beef patties, or try turkey or chicken for a lighter option. Don’t forget the cheese! A slice of cheddar or pepper jack melted on top just takes it to the next level. Load up your burger with your favorite toppings like fresh lettuce, ripe tomato slices, crispy bacon, and a dollop of ketchup or mayo. Yum!
Veggie Burgers
For a meatless twist, serve these buns with hearty veggie patties made from black beans, chickpeas, or lentils. You can also try a grilled portobello mushroom for a satisfying, meaty texture. Top with avocado slices, spinach, or a zingy homemade slaw for a fresh and colorful meal!
Sliders for Appetizers
Feeling festive? Make mini sliders using these buns for a fun appetizer at your next gathering! Fill them with a variety of fillings like pulled pork, barbecue chicken, or meatballs. Guests will love picking their favorites, and you can even set up a slider bar with different toppings and sauces to let everyone customize their own!
Salads on the Side
Pair your buns with a refreshing salad for a well-rounded meal. I love a classic coleslaw or a tangy cucumber salad. The crunch and brightness of fresh veggies perfectly balance the richness of the burger. You could even make a hearty potato salad or a quinoa salad for something a bit different!
Soup & Sandwich Combo
These buns also make great accompaniments to hearty soups! Try serving them alongside a comforting bowl of chili or a creamy tomato basil soup. You can even make sandwiches with the buns filled with deli meats, cheese, and your favorite spreads. Think of it as a cozy meal for those chilly nights!
With so many options, you can mix and match to create your perfect meal. These quick hamburger buns are just the beginning of a delicious journey, so get creative and enjoy every bite!
Print
quick hamburger buns: 7 Irresistibly Soft Recipes to Try
- Total Time: 1 hour 30 minutes
- Yield: 6 buns 1x
- Diet: Vegetarian
Description
Easy and quick recipe for hamburger buns.
Ingredients
- 2 cups all-purpose flour
- 1 cup warm water
- 2 tablespoons sugar
- 1 tablespoon active dry yeast
- 1 teaspoon salt
- 2 tablespoons vegetable oil
Instructions
- In a bowl, mix warm water, sugar, and yeast. Let it sit for 5 minutes.
- Add flour, salt, and oil. Mix until combined.
- Knead the dough for 5 minutes until smooth.
- Cover the dough and let it rise for 1 hour.
- Preheat the oven to 375°F (190°C).
- Divide the dough into 6 equal parts and shape them into buns.
- Place buns on a baking sheet and let them rise for another 30 minutes.
- Bake for 15-20 minutes until golden brown.
Notes
- Store buns in an airtight container.
- These buns can be frozen for later use.
- Prep Time: 10 minutes
- Cook Time: 20 minutes
- Category: Baking
- Method: Baking
- Cuisine: American
Nutrition
- Serving Size: 1 bun
- Calories: 150
- Sugar: 2g
- Sodium: 200mg
- Fat: 3g
- Saturated Fat: 0g
- Unsaturated Fat: 2g
- Trans Fat: 0g
- Carbohydrates: 28g
- Fiber: 1g
- Protein: 4g
- Cholesterol: 0mg
Keywords: quick hamburger buns