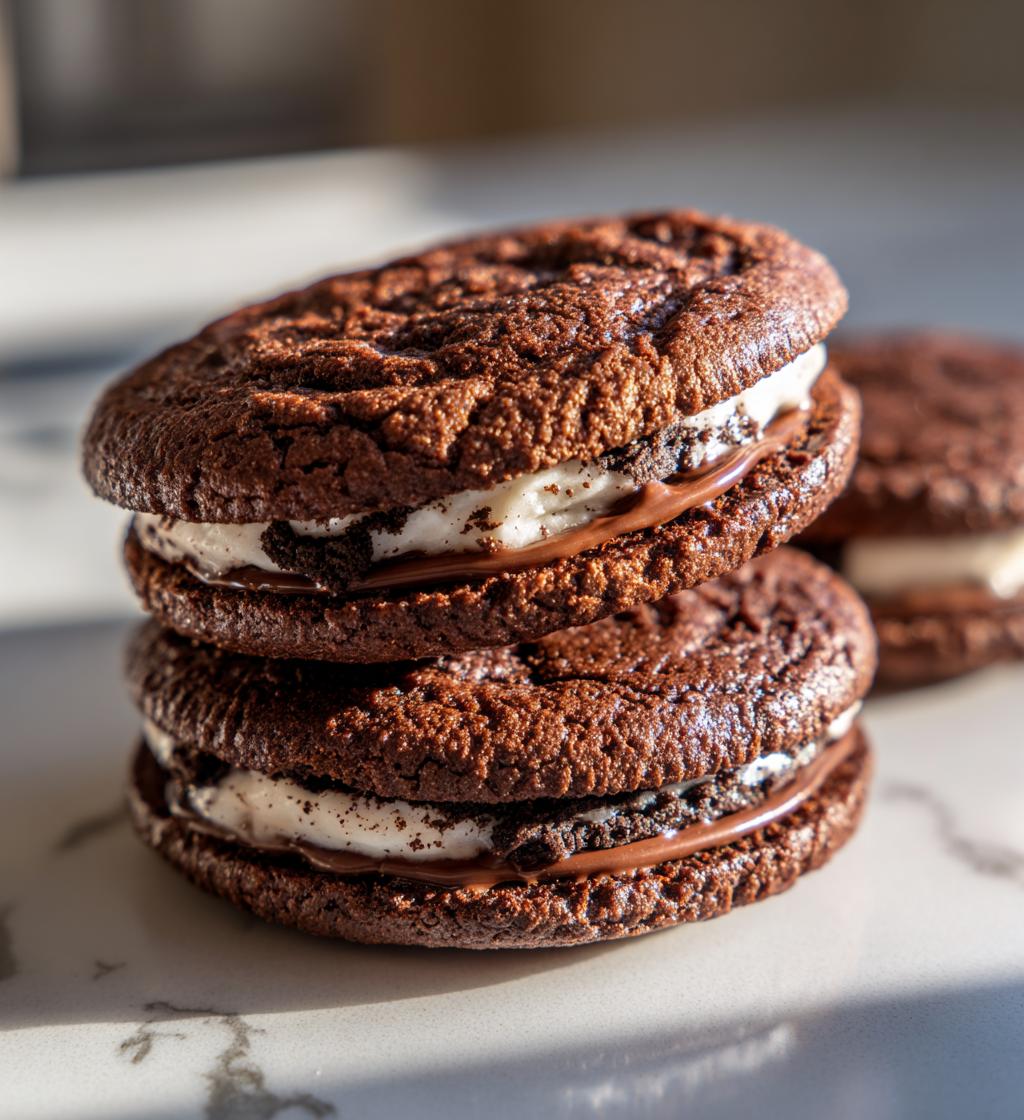
Oh, the sheer joy of making Oreo cookies at home! I can’t tell you how satisfying it is to whip up a batch of these delightful treats from scratch. There’s something magical about creating those iconic chocolatey cookies with a creamy filling that just can’t be matched by store-bought versions. I remember the first time I decided to try making my own Oreo cookies; the excitement was palpable! I could already imagine the deliciousness filling my kitchen as I mixed the ingredients. The smell of cocoa wafting through the air? Pure bliss! Plus, when you make them yourself, you can adjust the sweetness and even experiment with flavors. Seriously, homemade Oreo cookies are not just a dessert; they’re a fun experience that you can share with family and friends. Trust me, once you take that first bite, you’ll never want to go back to the packaged kind again!
Ingredients for Oreo Cookie
To make these delicious homemade Oreo cookies, you’ll need some simple yet essential ingredients that come together beautifully. Here’s what you’ll need:
- 1 cup all-purpose flour – this provides the perfect base for your cookies.
- 1/2 cup unsweetened cocoa powder – it gives those rich chocolatey vibes.
- 1/2 cup sugar – to sweeten things up just right!
- 1/4 teaspoon baking soda – a little lift goes a long way.
- 1/4 teaspoon baking powder – helps keep those cookies nice and fluffy.
- 1/4 teaspoon salt – balances out the sweetness.
- 1/2 cup unsalted butter, softened – this adds richness and flavor.
- 1/2 teaspoon vanilla extract – for that lovely aromatic touch.
- 1 cup powdered sugar – for that creamy filling.
- 2 tablespoons milk – to help create the perfect filling consistency.
Gather these ingredients, and you’ll be well on your way to baking up a storm!
How to Prepare Oreo Cookies
Making homemade Oreo cookies is a fun and straightforward process, and I promise you’ll love every minute of it! Let’s break it down step by step, so you can create your own batch of deliciousness.
First things first, you’ll want to preheat your oven to 350°F (175°C). This is an essential step because a properly heated oven ensures that your cookies bake evenly and achieve that perfect texture.
Next, grab a large mixing bowl and combine your dry ingredients: 1 cup of all-purpose flour, 1/2 cup of unsweetened cocoa powder, 1/2 cup of sugar, 1/4 teaspoon of baking soda, 1/4 teaspoon of baking powder, and 1/4 teaspoon of salt. Mix them together until they’re well blended; this step helps distribute the leavening agents evenly throughout the flour. You want to make sure you don’t have any lumps in there!
Now, it’s time to add the wet ingredients. Add 1/2 cup of softened unsalted butter and 1/2 teaspoon of vanilla extract to the bowl. Mix everything together until the dough forms. Don’t be afraid to get your hands in there; it’s the best way to ensure everything is combined well!
Once your dough is ready, roll it into small balls—about the size of a tablespoon—and place them on a baking sheet lined with parchment paper. Make sure to leave some space between them because they will spread a little as they bake.
Bake your cookies in the preheated oven for about 10 minutes. When they’re done, they should be firm but still soft in the center. Let them cool on the baking sheet for a few minutes before transferring them to a wire rack to cool completely.
Step-by-Step Instructions
- Preheat the oven to 350°F (175°C).
- In a large mixing bowl, combine 1 cup of all-purpose flour, 1/2 cup of unsweetened cocoa powder, 1/2 cup of sugar, 1/4 teaspoon of baking soda, 1/4 teaspoon of baking powder, and 1/4 teaspoon of salt. Mix until smooth.
- Add 1/2 cup of softened unsalted butter and 1/2 teaspoon of vanilla extract. Mix until a dough forms.
- Roll the dough into small balls, about the size of a tablespoon, and place them on a parchment-lined baking sheet, leaving space in between.
- Bake for 10 minutes. The cookies should be set but still soft in the center.
- Let the cookies cool on the baking sheet for a few minutes before transferring them to a wire rack to cool completely.
And there you have it! Follow these steps, and you’ll be on your way to enjoying your very own homemade Oreo cookies!
Nutritional Information
Now, let’s talk numbers! These homemade Oreo cookies are not only delicious but also come with some pretty straightforward nutritional values. Keep in mind that these are estimates, but here’s what you can expect per cookie:
- Calories: 150
- Sugar: 10g
- Fat: 7g
- Protein: 2g
- Carbohydrates: 20g
- Fiber: 1g
- Sodium: 50mg
- Cholesterol: 20mg
These values make it easy to enjoy your treats without too much guilt. Just remember, moderation is key! Enjoy every bite of your homemade Oreo cookies!
Tips for Success
Making the perfect homemade Oreo cookies can be a breeze with just a few simple tips! First off, make sure your butter is truly softened; it should be pliable but not melted. This helps create that nice, creamy texture in your dough.
Another key point is to accurately measure your flour and cocoa powder. Use a spoon to fluff them up, then spoon them into your measuring cup and level off with a knife. This prevents overpacking, which can lead to dry cookies!
When rolling your dough into balls, try to keep them uniform in size for even baking. And don’t forget to leave enough space between them on the baking sheet to allow for spreading. Lastly, let your cookies cool on the baking sheet for a few minutes before transferring them to a wire rack. This ensures they maintain their shape and don’t crumble apart. Happy baking!
Variations of Oreo Cookie Recipe
The beauty of homemade Oreo cookies is that you can really let your creativity shine! One of my favorite twists is to add chocolate chips to the cookie dough for an extra chocolatey kick. Just fold in about 1/2 cup of semi-sweet chocolate chips after mixing your dough.
Another fun variation is to switch up the filling. Instead of the classic creamy filling, try adding a hint of peanut butter or even some mint extract for a refreshing twist. You can also mix in some crushed candy canes during the holiday season for a festive touch!
Feel free to experiment with different flavor combinations that excite your taste buds. The possibilities are endless!
Storage & Reheating Instructions
To keep your homemade Oreo cookies fresh and delicious, store them in an airtight container at room temperature. This will help maintain their soft texture and prevent them from getting stale. If you want to keep them for a longer period, you can also freeze them! Just place the cookies in a freezer-safe bag or container, separating layers with parchment paper to avoid sticking. When you’re ready to enjoy them again, let them thaw at room temperature, or pop them in the microwave for just a few seconds to warm them up. Trust me, a warm Oreo cookie is pure heaven!
Why You’ll Love This Recipe
- Quick Preparation: You can whip up a batch of these cookies in just 25 minutes!
- Great Flavor: The rich chocolate and creamy filling will have you coming back for more.
- Fun Activity: Perfect for baking with kids or friends; everyone can join in the fun!
- Customizable: Easily switch up flavors and fillings to match your cravings!
FAQ About Oreo Cookies
Got questions about making these delicious homemade Oreo cookies? I’ve got you covered! Let’s tackle some of the most common queries.
Can I substitute ingredients in this recipe? Absolutely! If you’re out of cocoa powder, you can use carob powder for a different flavor. Don’t have unsalted butter? You can use salted butter, just skip the added salt in the recipe.
How should I store my Oreo cookies? To keep your cookies fresh, store them in an airtight container at room temperature. They’ll stay delicious for about a week! If you want to keep them longer, freeze them for up to three months.
Can I make these cookies gluten-free? Yes! Simply substitute the all-purpose flour with a 1:1 gluten-free baking blend. You’ll still get that wonderful taste and texture!
Can I make the filling ahead of time? Sure! Just store the filling in the fridge in an airtight container. When you’re ready to assemble your cookies, give it a quick stir to bring it back to life!
Print
Oreo cookie magic: 7 steps to delicious homemade bliss
- Total Time: 25 minutes
- Yield: 12 cookies 1x
- Diet: Vegetarian
Description
Delicious homemade Oreo cookies with a creamy filling.
Ingredients
- 1 cup all-purpose flour
- 1/2 cup unsweetened cocoa powder
- 1/2 cup sugar
- 1/4 teaspoon baking soda
- 1/4 teaspoon baking powder
- 1/4 teaspoon salt
- 1/2 cup unsalted butter, softened
- 1/2 teaspoon vanilla extract
- 1 cup powdered sugar
- 2 tablespoons milk
Instructions
- Preheat oven to 350°F (175°C).
- In a bowl, mix flour, cocoa powder, sugar, baking soda, baking powder, and salt.
- Add butter and vanilla. Mix until dough forms.
- Roll dough into small balls and place on a baking sheet.
- Bake for 10 minutes. Let cool.
- In another bowl, mix powdered sugar and milk to make the filling.
- Spread filling between two cookies to make sandwiches.
Notes
- Store in an airtight container.
- Can add chocolate chips for extra flavor.
- Adjust sweetness by changing sugar amount.
- Prep Time: 15 minutes
- Cook Time: 10 minutes
- Category: Dessert
- Method: Baking
- Cuisine: American
Nutrition
- Serving Size: 1 cookie
- Calories: 150
- Sugar: 10g
- Sodium: 50mg
- Fat: 7g
- Saturated Fat: 4g
- Unsaturated Fat: 2g
- Trans Fat: 0g
- Carbohydrates: 20g
- Fiber: 1g
- Protein: 2g
- Cholesterol: 20mg
Keywords: oreo cookie, homemade cookie, dessert